
Home · Guides · Shop Organization
How to organize a toolbox: a complete system that stays organized
From a junk-drawer rolling chest to a box where every tool has an address. Written from the VoltariTek workbench in Oregon, by the person who designs our labels.
To organize a toolbox, empty it completely, get rid of what you do not use, sort the rest by the job each tool does, assign every job group its own drawer based on weight and how often you reach for it, set up foam, rails, or bins inside each drawer, and label every drawer face so you can read the system from across the shop. Then protect it with a two-minute reset at the end of each job.
The short version
- Empty every drawer and purge broken, duplicate, and borrowed tools.
- Sort what is left by job, not by size.
- Map zones: light and frequent up top, heavy and occasional down low.
- Give each drawer exactly one category.
- Lay out the inside of each drawer with foam, socket rails, or bins.
- Label every drawer face with large, high-contrast, movable labels.
- Reset after every job and relabel the moment a category changes.
In this guide: Before you start · Sort tools by job · Map your toolbox zones · Inside each drawer · Build a labeling system · Which labels go where · Maintenance routine · Common mistakes · Quick-start checklist · FAQ
Before you start: what you need
Block out an afternoon for a full rolling chest, or an hour for a top box. Have these on hand:
- A clear surface such as a workbench, a folding table, or a tarp on the floor, big enough to lay out every tool at once.
- Three boxes marked Keep, Relocate (belongs in the garage, not the box), and Donate or Toss.
- Degreaser and shop rags to clean drawer bottoms while they are empty.
- Drawer liners if yours are worn or missing.
- Your organizers: foam, socket rails, wrench racks, small-parts bins. Measure your drawers before you buy any of these.
- Labels for the drawer faces. You will not know the final list until Step 4, so plan the labeling last.
Step 1: Empty it completely and purge
Pull every tool out of every drawer. Not "most" of them. A half-emptied box hides the problem, because the clutter you leave in place is the clutter that wins. With everything on the bench, sort into the three boxes:
- Toss or donate broken tools, rounded sockets, stripped bits, and the fourth identical flathead.
- Relocate things that live in the toolbox only because it was the nearest flat surface: paint cans, spare filters, old receipts, the box from a tool you already unpacked.
- Return anything that belongs to someone else.
While the drawers are empty, wipe them out, check the slides, and replace any liners that are torn or oil-soaked. This is the only time it will be this easy.
Step 2: Sort tools by category, meaning by job
Group what is left by the job you use it for, not by its size or brand. You reach for a tool because of the task in front of you ("I need to cut this," "I need to torque that"), so a drawer that holds everything for one job beats a drawer of similar-looking objects you still have to dig through. Within each group, then sort by size.
Most toolboxes break down into these categories:
Hand tools
- Sockets, split by drive size (1/4, 3/8, 1/2), then SAE or metric, then shallow or deep. Our socket organization guide covers that sort in detail.
- Ratchets, extensions, and breaker bars, kept next to the sockets they drive.
- Wrenches: combination, ratcheting, flare nut, and adjustable.
- Pliers and cutters: slip joint, needle nose, locking, side cutters.
- Screwdrivers, hex keys, and bits.
- Hammers, pry bars, and picks.
Measuring and marking
- Tape measures, calipers, squares, feeler gauges, markers, scribes.
Fasteners and electrical
- Nuts, bolts, washers, screws, and anchors, in bins rather than loose.
- Fuses, relays, terminals, connectors, wire, heat shrink, and tape.
Power tools and specialty or service tools
- Drills, impact drivers, batteries, and chargers.
- Trade-specific tools: brake tools, oil filter wrenches, test equipment, whatever your work actually calls for.
Shop chemicals
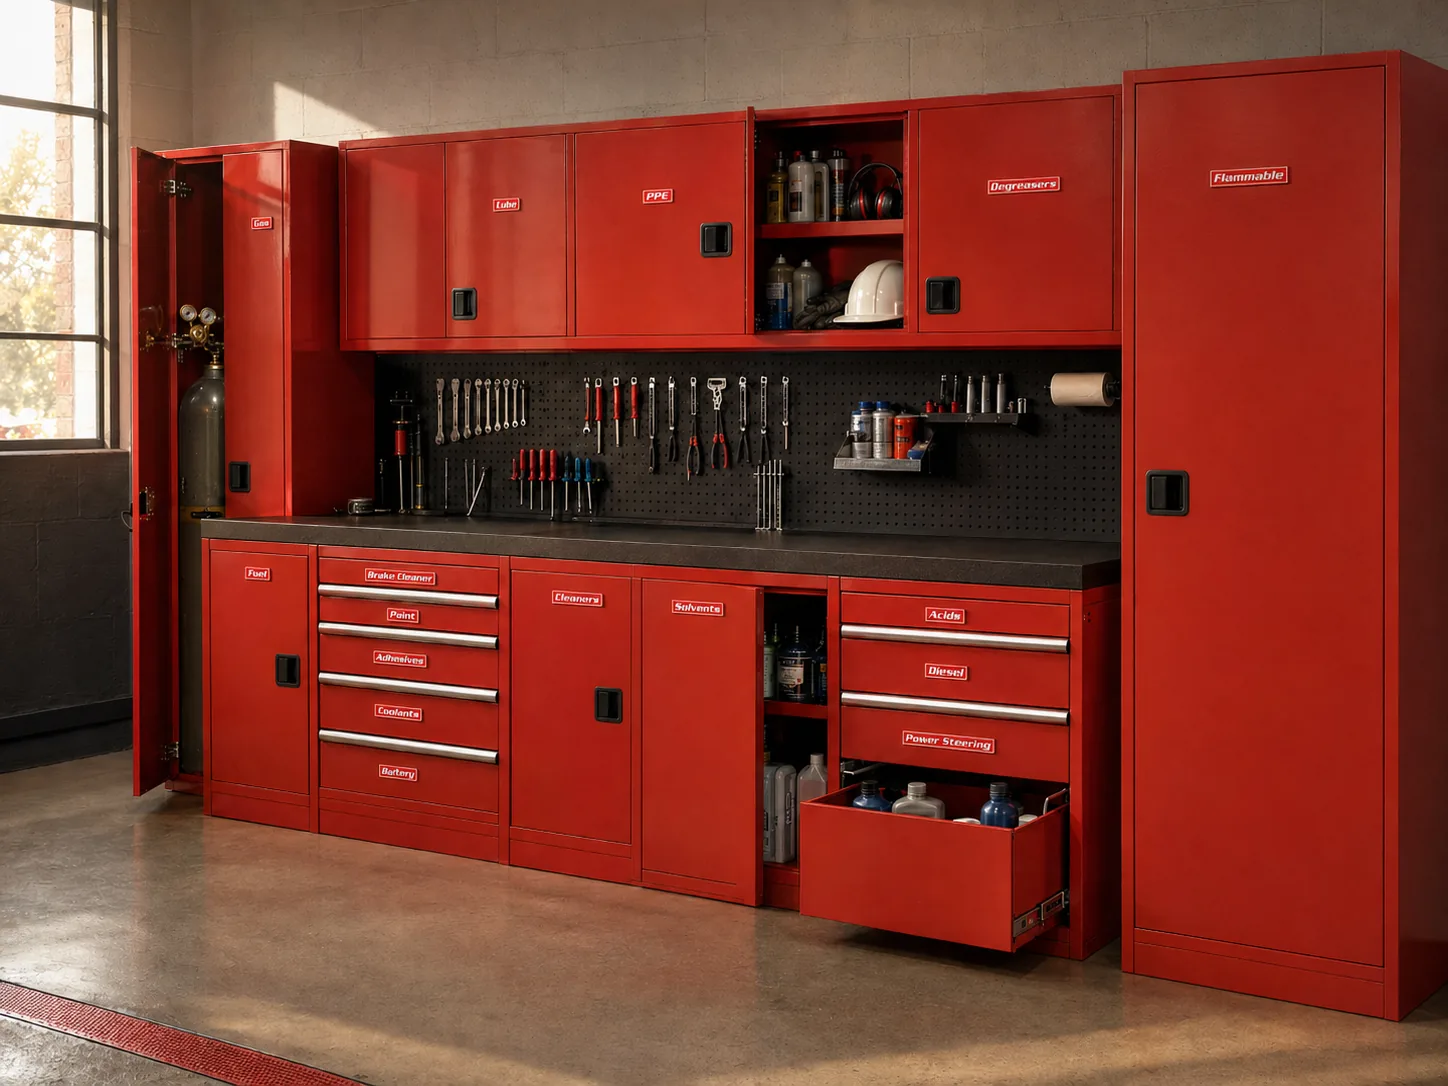
Solvents, brake cleaner, fuels, and adhesives do not belong in a drawer full of hand tools. Give them their own cabinet. Our guide on how to label a hazmat cabinet shows how to keep that zone safe and obvious.
Step 3: Map your toolbox zones, top down
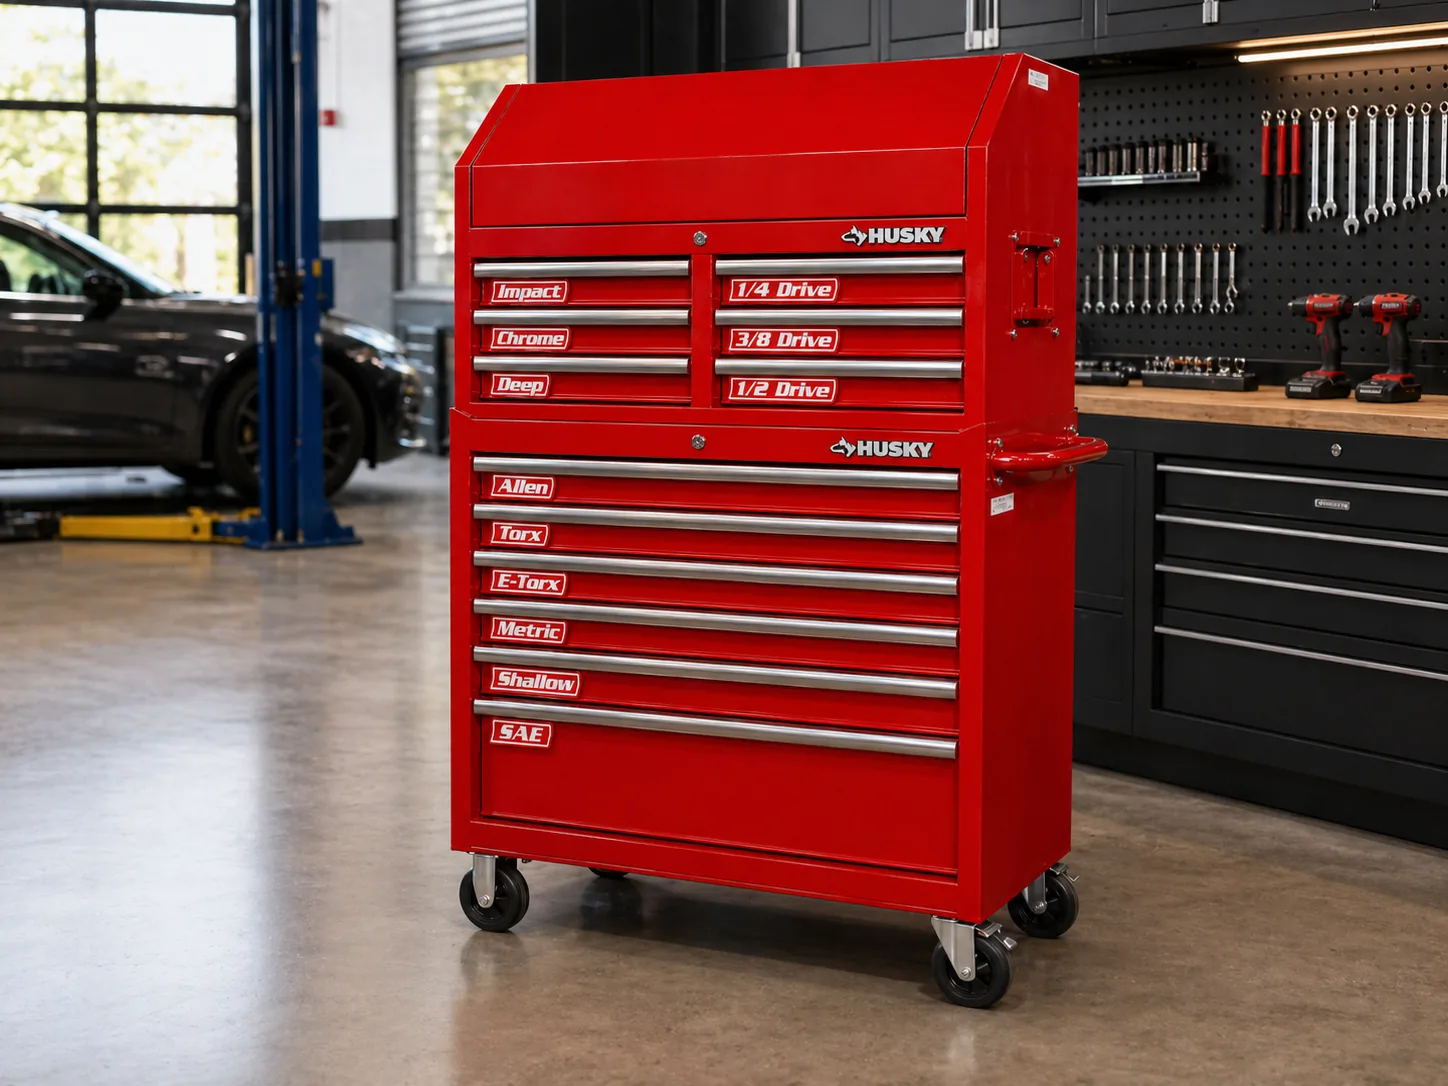
Now decide where each category lives. Two rules decide almost everything: how often you reach for it and how much it weighs. Frequent and light goes high. Heavy and occasional goes low. Heavy drawers down low also keep a rolling chest's center of gravity where it belongs, which matters when the top box is loaded and you push it across the shop.
The lid tray or top till
The things you grab ten times a job: your main ratchet, the tape measure, a utility knife, a flashlight. Keep it to what you really use daily, or it turns into the new junk drawer.
Top shallow drawers
Small, light, high-frequency tools: measuring and marking, screwdrivers and bits, picks, hex keys. Shallow drawers are easy to scan, which is exactly what small tools need.
Middle drawers
The workhorses: sockets by drive, wrenches, pliers, and cutters. Give sockets as many drawers as they need. They are the category most likely to sprawl.
Bottom deep drawers
Heavy and bulky items: power tools, batteries and chargers, breaker bars, large specialty tools, and fastener bins.
Side lockers and cabinets
Long tools, pry bars, and anything that does not lie flat. Chemicals go in a separate cabinet, not here.
A starting layout for a typical general or automotive chest:
| Zone | Category | Why it lives here |
|---|---|---|
| Lid tray | Daily drivers | Grabbed constantly, keep it short |
| Top, shallow | Measuring and marking | Small, light, easy to see |
| Top, shallow | Screwdrivers, hex keys, bits | High frequency, light |
| Upper middle | Pliers and cutters | Mid weight, used often |
| Middle | 1/4 and 3/8 drive sockets | Heavy, deserves dedicated drawers |
| Middle | 1/2 drive and impact sockets | Heavier, kept lower |
| Middle | Wrenches | Long, lie flat best in wide drawers |
| Lower | Fasteners and electrical | Bins and trays sit well down low |
| Bottom, deep | Power tools and batteries | Heaviest items lower the center of gravity |
| Bottom, deep | Specialty and service tools | Used occasionally, often bulky |
The rule that holds it together: one drawer, one job. The second a drawer becomes "pliers and also some electrical stuff," you have to remember an exception, and the system starts to rot. If a category outgrows its drawer, split it logically (shallow sockets in one, deep in the next). If you have more drawers than categories, leave one empty as a deliberate overflow drawer. For a deeper look at drawer-by-drawer decisions, read our companion guide on how to organize toolbox drawers.
Step 4: Lay out the inside of each drawer
The drawer face tells you which drawer. The layout inside tells you which tool, and whether one is missing.
Foam shadow inserts
Two-color foam cut to the outline of each tool is the gold standard for wrenches, pliers, and anything with an odd shape. The contrasting color shows through the moment a tool is missing, which is why shops that track tools rely on it. Cut foam only after your sort is final, since moving tools later means recutting.
Shadow boards
The wall-mounted version of the same idea. Outline each tool on a pegboard or panel so its spot is obvious. Shadow boards are great for long tools and anything you want visible from the bench.
Socket rails and trays
Rails with size markings keep sockets in order and lift out as a set. Run one rail per drive size and system, so a 3/8 metric deep rail never mixes with a 1/4 SAE shallow one.
Wrench racks
Racks stand wrenches on edge in size order, which fits more wrenches in less drawer and makes a gap easy to spot.
Bins for small parts
Fasteners and electrical bits belong in divided bins, never loose. Sort bins by type, then size, and put the bins themselves in a drawer that has a clear label on the front.
Step 5: Build a labeling system for every drawer face
This is the step that turns a one-weekend cleanup into a system that lasts. Without labels you are relying on memory, and memory fails the first time someone borrows a tool, the first time you are three jobs deep and moving fast, or the first time you go a month without opening the box.
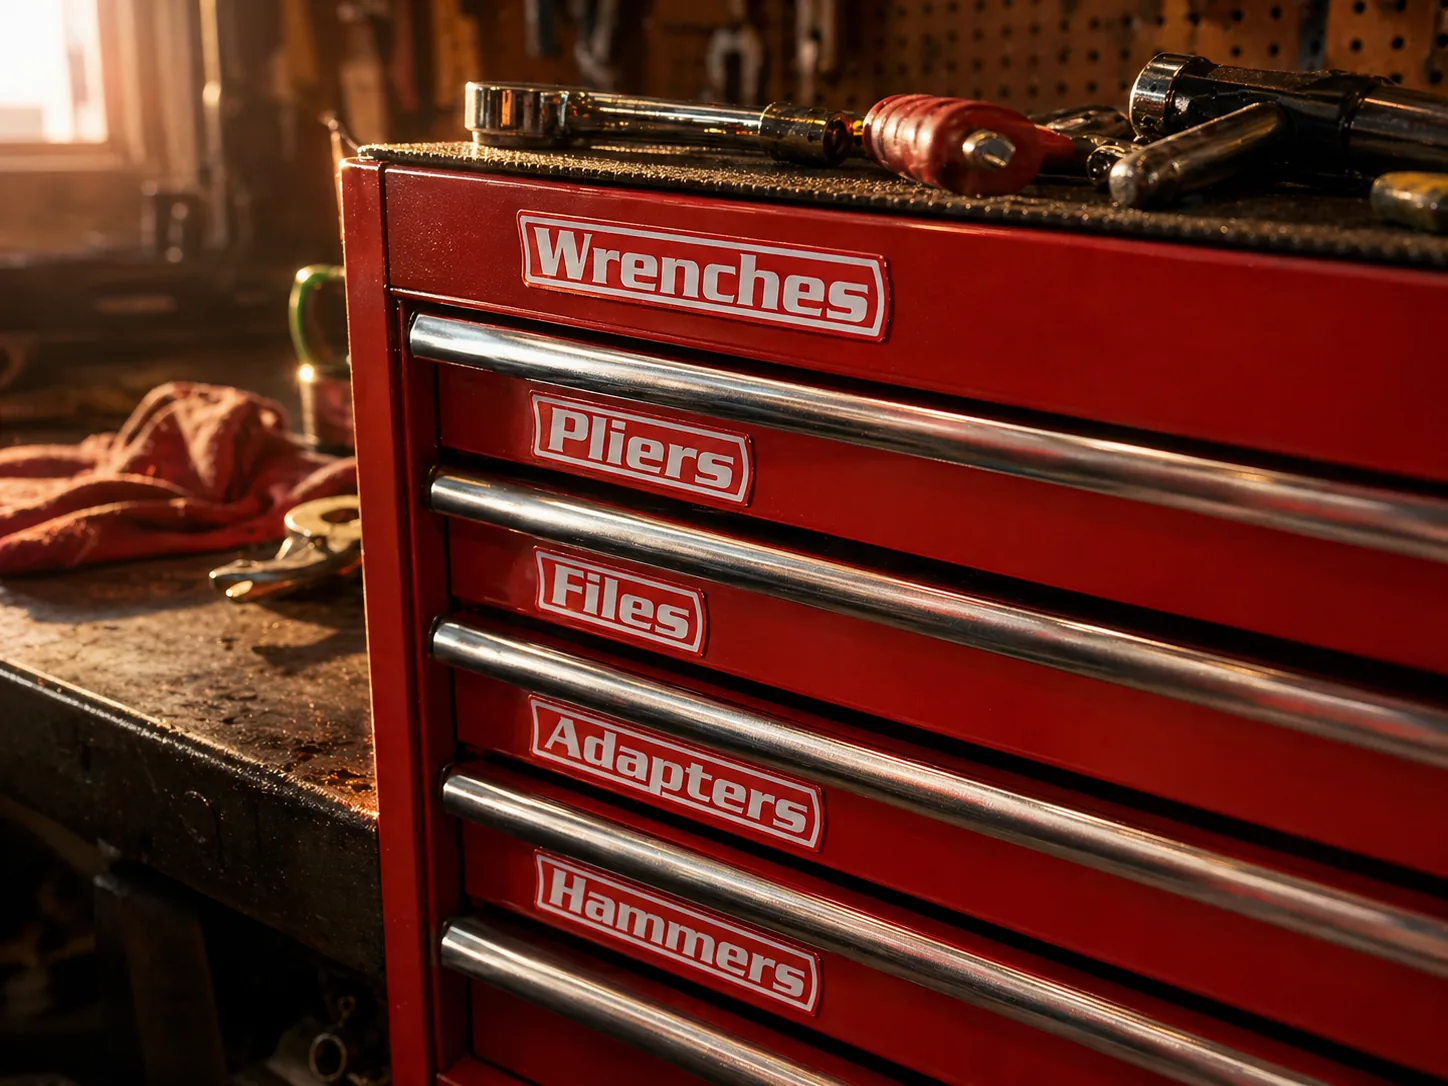
A good toolbox labeling system follows five rules:
- Outside, on the face. A label inside the drawer only helps after you have opened the wrong one.
- Readable from across the shop. Large, bold type and high contrast, so you can read it from a few steps away, not only up close.
- One word, one category. "Pliers," not "Pliers etc." If you cannot name the drawer in a word or two, fix the sort, not the label.
- Consistent everywhere. Same style, same color logic, same placement on every drawer, so the whole box reads as one system.
- Movable. Your tools will change. Your labels need to be able to change with them.
Why magnetic labels beat adhesive and engraved ones
That last rule is where most labeling systems fail. Your collection is not static. You buy a new socket set, pick up a trade, inherit a box, or split a crowded drawer in two. Every one of those changes means relabeling, and the label type decides whether that takes thirty seconds or ruins your afternoon.
| Label type | When you reorganize | Reads across the shop? | Best for |
|---|---|---|---|
| Adhesive stickers and printed tape | Peel, scrape, and clean residue; often tears or leaves adhesive behind | Usually small type | Bins and temporary labels |
| Engraved or riveted plates | Permanent; you live with the old name or drill new holes | Depends on plate size | Layouts that will never change |
| Magnetic labels | Lift off and move in seconds, no residue, no tools | Yes, if designed for it | Steel toolboxes and chests that evolve |
On a steel toolbox, magnetic is the clear winner, with one catch: the magnet has to be strong enough. The most common complaint about cheap magnetic labels is that they slide or drop every time a drawer slams, because a small, low-grade magnet sits buried behind a layer of plastic that keeps it from touching the steel. Our full comparison of magnetic vs adhesive vs engraved toolbox labels goes deeper on each type.
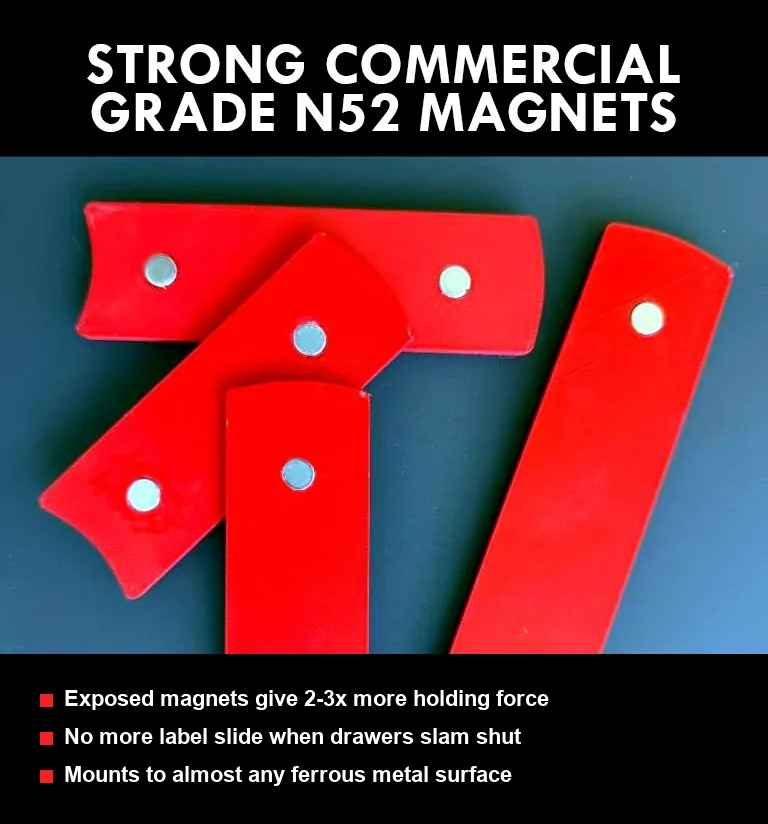
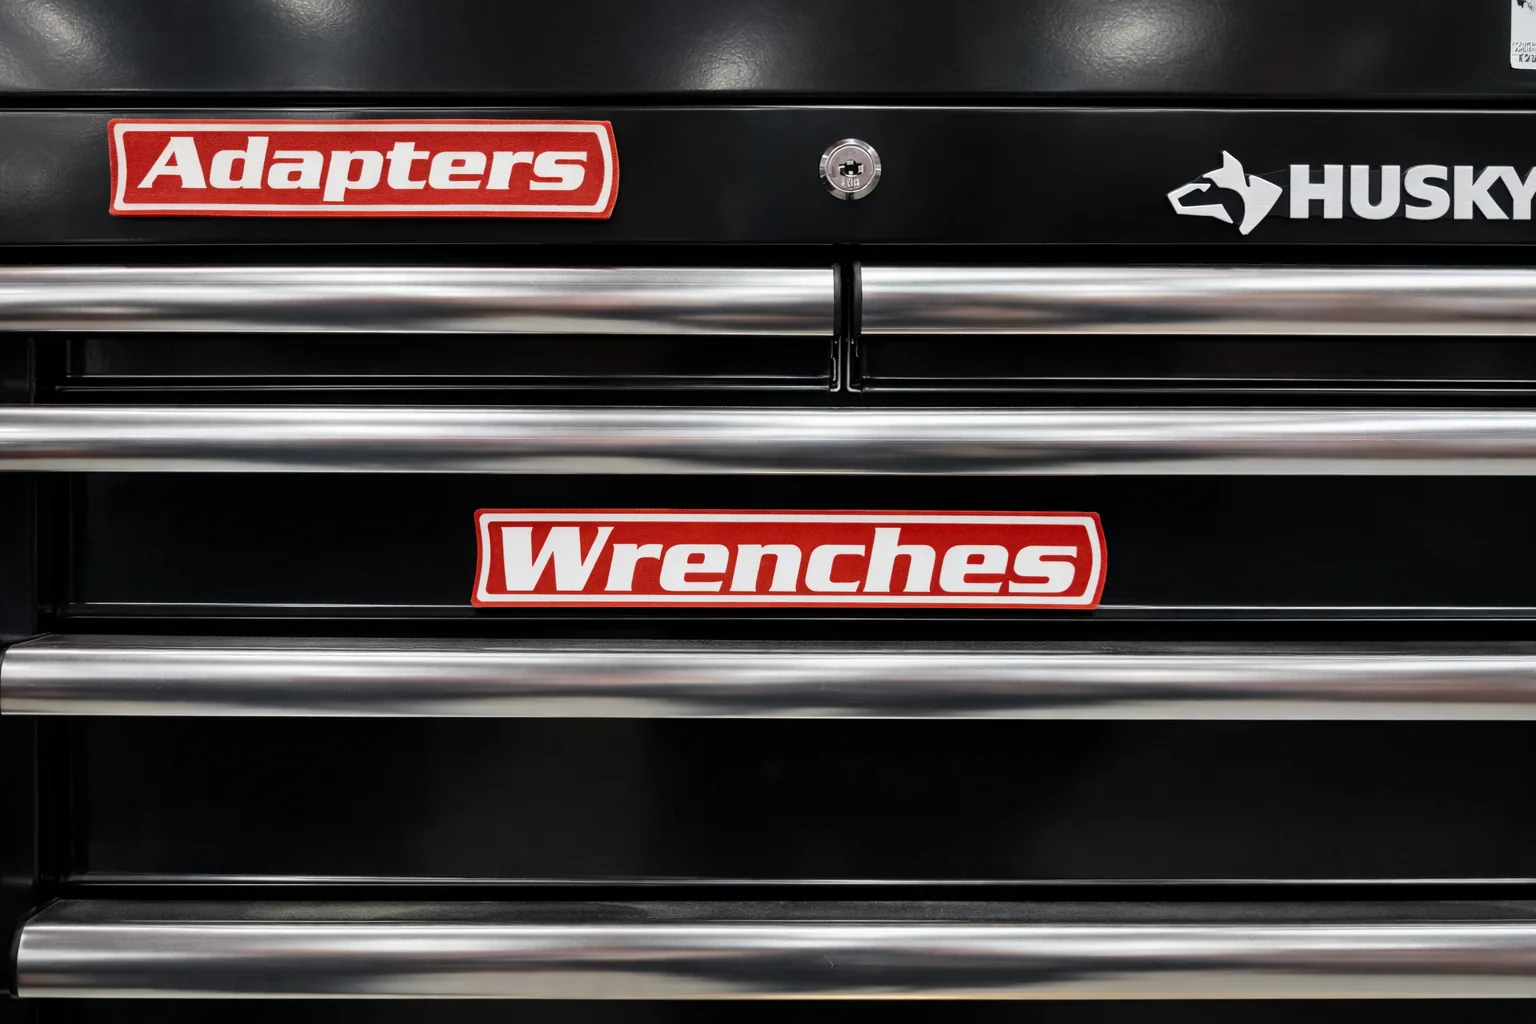
That is the problem VoltariTek magnetic toolbox labels are built to solve. Each label carries two exposed N52 neodymium magnets at about 1.5 lbs of pull each. N52 is the highest commercial neodymium grade (the guide to magnet grades N35 vs N42 vs N52 explains what that number means), and because the magnet is exposed instead of buried, it meets the steel directly. Slam the drawer. The label stays put. And if it ever stops holding in normal shop use, our 1-Year Hold Guarantee replaces it.
The other half is readability. Every label uses the same white-on-color typography in red, black, or blue, sized to read across the shop instead of from six inches away. Because the whole line is designed in-house by one engineer, a drawer of sockets and a cabinet of chemicals look like parts of the same system.
Label the system you just built
Design a complete magnetic-label system, not just a custom label.
Start from a themed pack for the categories every toolbox has, then use the custom label builder for the drawers that are uniquely yours. Exposed N52 magnets, white-on-color type in red, black, or blue, printed in Oregon, free US shipping.
Shop the Label Packs Build Custom LabelsWhich label pack fits which part of your toolbox
If you followed the zone map above, your drawer list probably overlaps heavily with one or more of these packs. Each pack is a set of matching labels for one area of the shop, so you can label a whole zone at once.

Automotive Sockets
For your middle socket drawers: drive sizes, SAE, metric, deep, shallow, impact, Torx.

Automotive Hand Tools
For the upper and middle drawers: ratchets, wrenches, pliers, screwdrivers, pry bars.

General Essentials
The universal starter set for a home garage or crossover box.

Electrical & Fasteners
For the lower drawers and parts bins: hardware and electrical, cleanly separated.

Auto Maintenance
For specialty and service tool drawers: oil, brakes, coolant, fuel system.

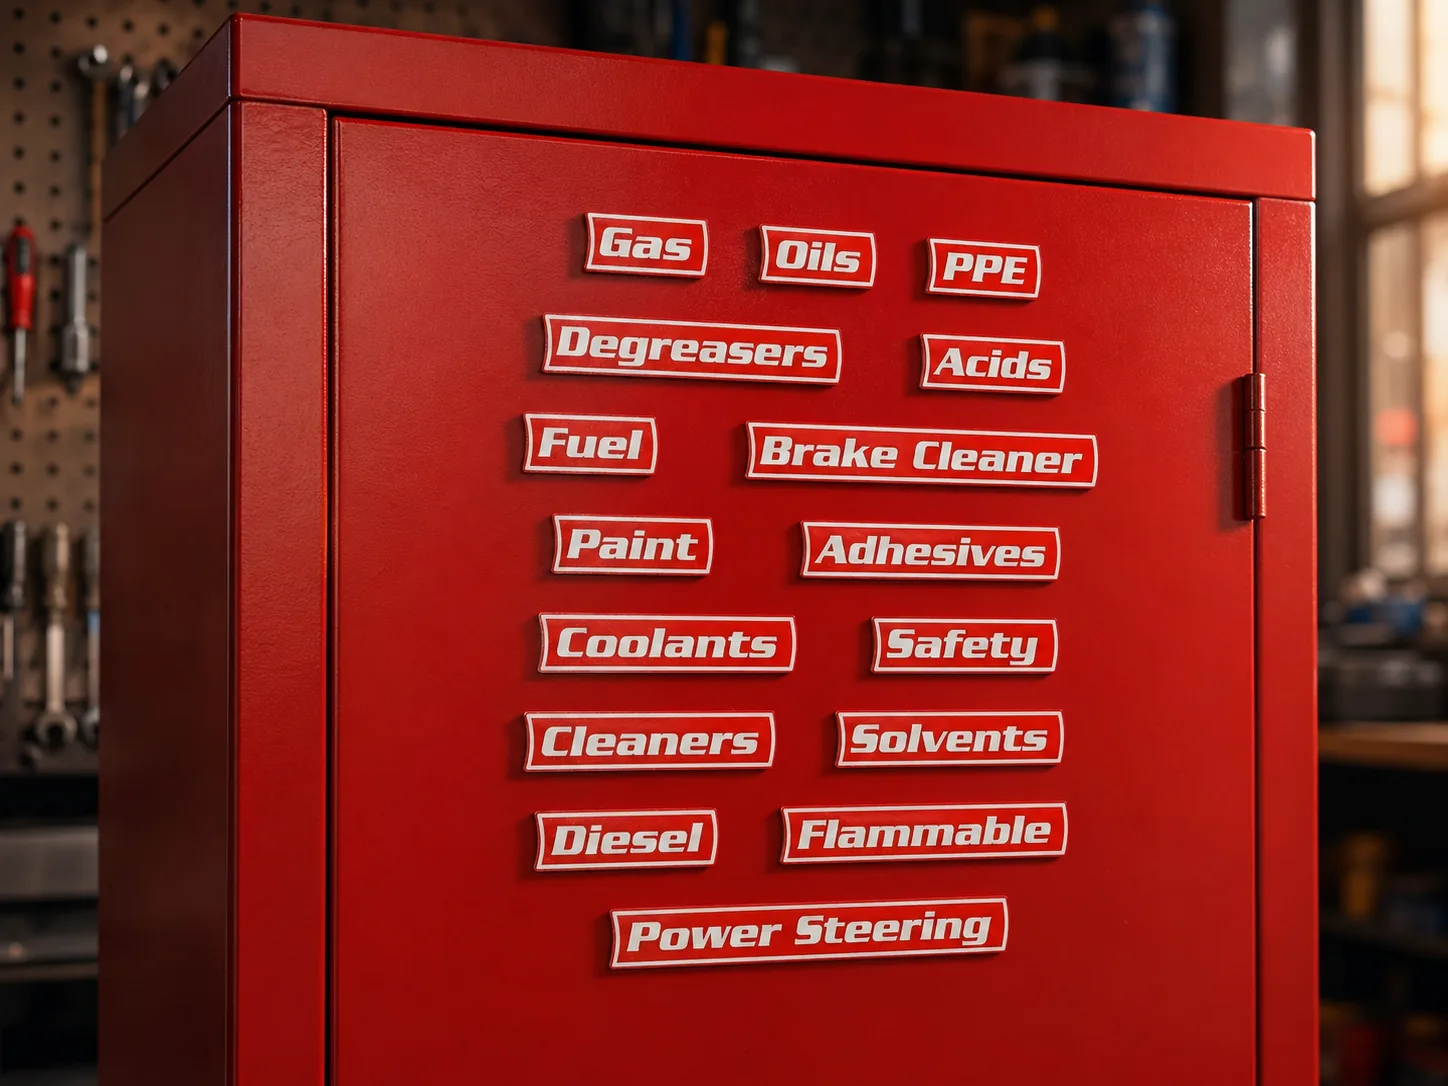
Hazmat & Shop Chemicals
For the chemical cabinet: fuels, solvents, cleaners, PPE.
Every pack comes in red, black, or blue. Match your chest, or use color as part of the system: one color for hand tools, another for parts and consumables. For drawers no pack covers, like a specialty tool you use every week, a second trade, or your own shorthand, the custom label builder prints any word you need in the same style. Custom labels start at $13.99 for 5, then $2 for each label after that, up to 16 per order. The builder measures each label as you type, so you know it fits before you order. Need ideas for what to name each drawer? See toolbox label ideas for a home garage vs a pro shop.
Not sure your box will hold a magnet? Most rolling chests and top boxes from Husky, Craftsman, Snap-On, Matco, Milwaukee, US General, Kobalt, and Harbor Freight are ferrous steel. Do the ten-second fridge-magnet test described in will magnets stick to my toolbox? If it does not grab, the surface is aluminum or non-magnetic, and we can add 3M VHB adhesive backing for an additional fee.
Step 6: A maintenance routine that keeps it organized
Organizing the box takes a weekend. Keeping it organized takes a few minutes a week, as long as you build in the habit.
- End of every job (2 minutes): every tool back to its labeled drawer, not the nearest open one. Empty the lid tray of anything that is not a daily driver.
- Weekly (5 minutes): open each drawer, look for gaps in the foam or rails, and track down what is missing while you still remember where you used it.
- Every few months: wipe down drawers, check slides and liners, and ask whether any drawer has drifted into two categories. Split it if it has.
- Whenever your tools change: relabel immediately. A label you have learned to ignore is worse than no label. With magnetic labels, that means moving a label, not scraping one off.
Common toolbox organization mistakes
- Sorting by size instead of job. A drawer of "small things" still needs digging. Sort by task first.
- Buying organizers before sorting. Foam and rails bought on day one rarely fit the categories you end up with. Sort first, measure, then buy.
- Mixed-category drawers. Every exception is something you have to remember. One drawer, one job.
- Heavy tools up top. It strains the slides and makes a rolling chest top-heavy.
- Labels only inside the drawer, or no labels at all. You still open the wrong drawer first.
- Tiny, low-contrast labels. If you have to lean in to read it, it is not doing its job.
- Permanent labels on a changing collection. Stickers and engraving lock in today's layout. Your tools will not stay the same.
- Magnetic labels that slide. Weak, buried magnets drift every time a drawer slams. Look for exposed, high-grade magnets.
- Chemicals stored with hand tools. Give them their own cabinet.
Quick-start checklist
- Every drawer emptied, cleaned, and liners checked
- Broken, duplicate, and borrowed tools removed
- Tools sorted into job-based categories
- Categories mapped to drawers: light and frequent up top, heavy and occasional down low
- One category per drawer, plus one empty overflow drawer
- Foam, socket rails, wrench racks, or bins set up inside each drawer
- Chemicals moved to their own labeled cabinet
- Every drawer face labeled with large, high-contrast, movable labels (shop the packs or build your own)
- End-of-job reset added to your routine
Common questions
What is the best way to organize a toolbox?
Empty it completely, purge broken and duplicate tools, sort the rest by job, assign each group to one drawer by weight and frequency of use, set up foam, rails, or bins inside each drawer, then label every drawer face so it reads without opening anything.
What goes in the top drawers of a tool chest?
The lightest, most frequently used tools: measuring and marking tools, screwdrivers and bits, picks, and pliers. Heavy items like power tools and large sockets go in the deep bottom drawers to keep the center of gravity low.
Should toolbox drawers be labeled?
Yes. Labels turn a one-time cleanup into a lasting system. A labeled drawer face tells you, and anyone borrowing your tools, where things live and where they go back. Use large, high-contrast labels on the outside of the drawer.
Are magnetic toolbox labels better than stickers?
On a steel toolbox, yes, if the magnets are strong. Magnetic labels move when you reorganize and leave no residue. Cheap ones slide because the magnet is small and buried behind plastic. VoltariTek labels use two exposed N52 magnets per label, about 1.5 lbs of pull each, so they hold through the slam.
Will magnetic labels work on my toolbox?
On any ferrous steel toolbox, which covers most chests from Husky, Craftsman, Snap-On, Matco, Milwaukee, US General, Kobalt, and Harbor Freight. Test with a fridge magnet. If it does not grab, ask about 3M VHB adhesive backing.
How often should you reorganize a toolbox?
Reset after every job, check drawers weekly, and review the whole layout every few months or whenever you add tools. Relabel the moment a drawer's category changes.
Keep reading
- How to organize toolbox drawers so you actually find things
- Socket organization: drive sizes, SAE vs metric, deep vs shallow
- Toolbox label ideas for a home garage vs a pro shop
- Magnetic vs adhesive vs engraved toolbox labels
- Will magnets stick to my toolbox?
- N35 vs N42 vs N52: what magnet grade actually means
- How to label a hazmat and chemical cabinet
Finish the job
Your toolbox is organized. Now make it obvious.
Six themed packs from $19.99, or design your own labels from $13.99 for 5. Exposed N52 magnets that hold through the slam, a 1-Year Hold Guarantee, made in Oregon, free US shipping.
Shop the Packs Design Custom Labels